
How to Change the Battery in a Garage Door Opener: A Quick Step-by-Step Guide
Is your garage door opener acting sluggish, or is the remote control not responding as it used to? Before calling anyone for repair, the fix might be simpler than you think. Learning how to change the battery in your garage door opener is a quick task most homeowners can handle on their own.
This guide walks you through the full battery replacement process, step by step, so you can get your door working properly again without unnecessary trouble.
Signs You Need To Replace The Battery In Your Garage Door Opener
Garage door openers give you a few clear signals when the battery is running low. Knowing these signs early can save you from unexpected failures and protect the safety of your home.
Watch for these warning signs:
- The indicator light on your opener starts to flash or dims
- Your remote responds slowly or not at all
- The door hesitates, reverses, or moves with unusual resistance
- The opener unit powers on but fails to complete its function
Some garage door opener models, like those from the Chamberlain Group, include a low-battery alert built into the circuit board. If your model has this feature, an orange or red indicator light will flash to signal it is time for a replacement.
Do not ignore these signs. A weak battery can damage the opener’s electronic components over time and lead to more costly repairs down the road.
What You Need Before Replacing The Battery
Before you begin, gather the right tools and materials. Having everything ready ensures the process goes smoothly and reduces the risk of electrical hazards.
Here is what you will need:
- A replacement battery. Check your user manual or the existing battery for the correct size and voltage. Battery types vary by model, so verify the exact type before buying.
- A screwdriver – flathead or Phillips, depending on your opener
- Gloves and safety goggles for safe handling of electrical components
- A clean, dry workspace with good lighting
If you are unsure which battery to buy, search YouTube (or the manufacturer’s website) using your opener model number to find the exact battery type recommended by the manufacturer.
How To Change The Battery In Your Garage Door Opener: Step-By-Step
Follow these steps carefully to replace the battery without causing trouble or risking damage to the opener.
Step 1: Unplug The Garage Door Opener
Safety comes first. Unplug the garage door opener from the power outlet before working on any part of the unit. This step helps prevent electrical hazards while you handle the internal components.
Step 2: Locate The Battery Compartment
Look at the back or side of your opener unit. Most garage door openers have a battery compartment secured by a small screw or a snap-on cover. Use your screwdriver to loosen the screw if needed, then remove the cover to access the battery inside.
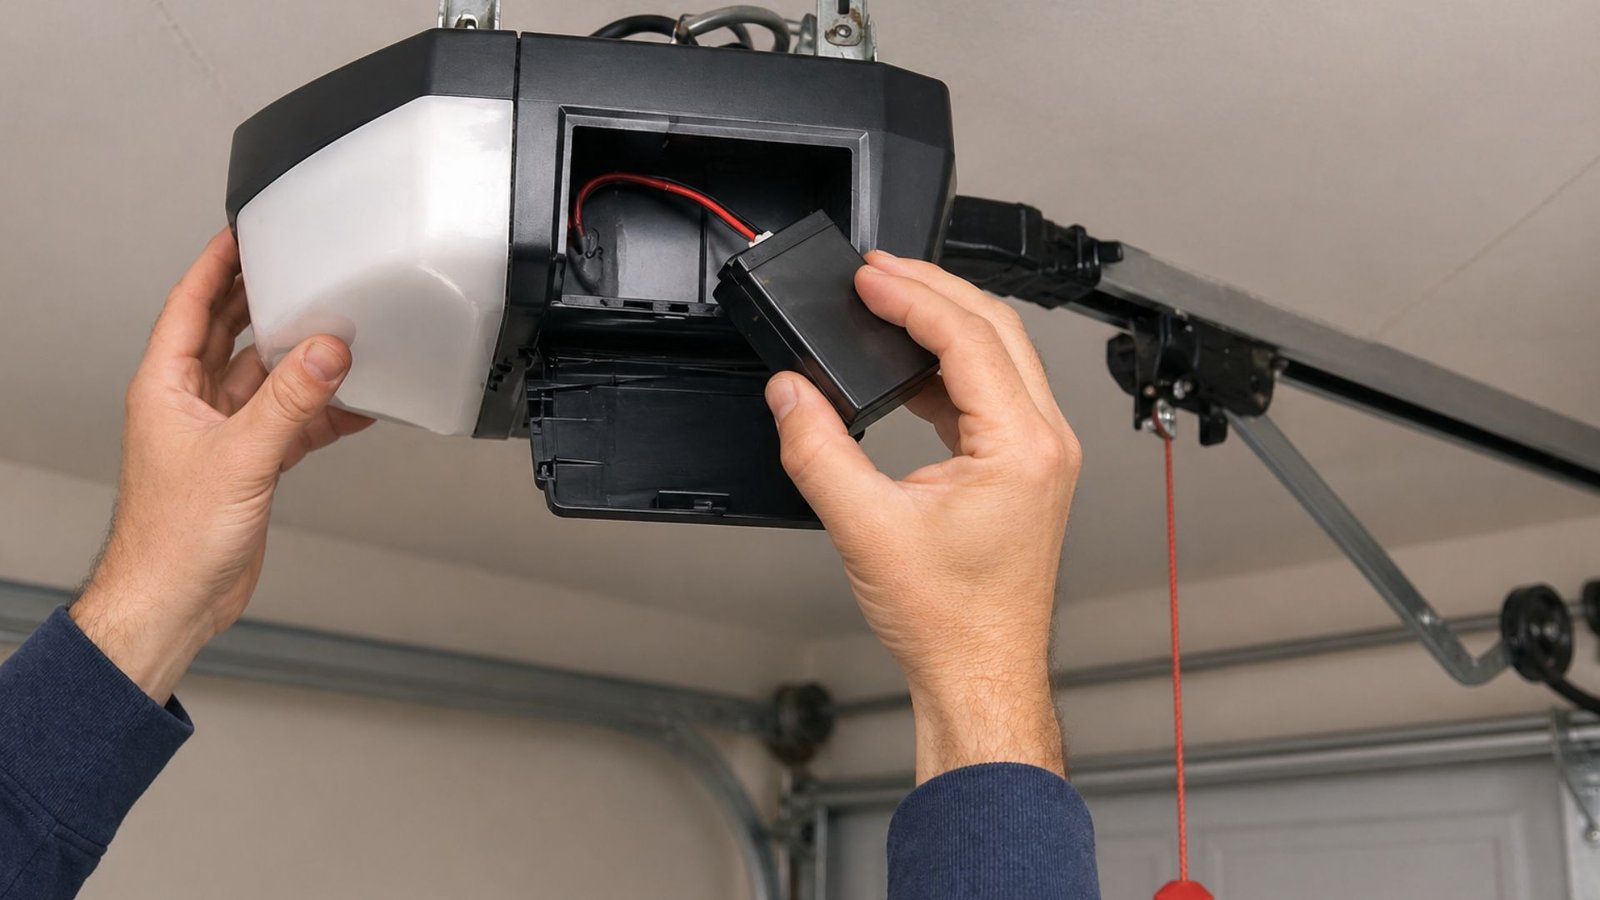
Step 3: Remove The Old Battery
Carefully disconnect the wire connections attached to the battery. Most units use red and black wires. The red wire connects to the positive terminal, and the black wire connects to the negative terminal. Pull the connectors gently to avoid damaging the wire or circuit board. Once disconnected, remove the old battery and set it aside for proper disposal.
Step 4: Insert The New Battery
Take your new battery and connect the wires correctly. Reconnect the red wire to the positive terminal first, then connect the black wires to the negative terminal. Insert the new battery into the battery compartment and secure the cover back in place. If there is a screw, tighten it firmly, but do not overtighten.
Step 5: Plug In And Test
Plug the garage door opener back in and give it a moment to power up. Press the remote control button to test whether the door opens and closes without hesitation. Check that the indicator light is solid rather than flashing, which confirms a proper battery connection.
If the opener is still not functioning correctly after the battery replacement, the issue may involve a deeper repair beyond just the battery.
Tips For Extending Garage Door Opener Battery Life
Replacing the battery regularly is good maintenance practice, but a few habits can help you get more charge out of each battery and reduce the need for frequent replacement.
- Avoid exposing your garage door opener to extreme heat, which can drain the battery faster
- Test your remote every few months to catch low battery signs early
- Keep the battery compartment clean and free of excessive dust or moisture
- Replace garage door opener batteries every 1 to 2 years as part of your regular maintenance schedule, even if no sign of trouble has appeared yet
Good battery care supports the overall functionality and safety of your entire garage door system.
When To Call A Professional For Garage Door Opener Help
Sometimes replacing the battery does not solve the problem. If your door is still unresponsive after installing a new battery, there may be a wiring issue, a damaged circuit, or a fault in the opener itself that needs expert attention.
In those cases, it is best to consult a professional rather than attempt further repairs on your own. Incorrectly handling electrical components can damage the opener further and create safety risks for your household.
The team at Level Up Garage Door offers professional garage door repair services for situations just like this – fast, reliable, and backed by licensed technicians who know garage door openers inside and out. Whether you need a backup battery system, a full opener replacement, or expert garage door installation, the right guidance is just a call away.
Homeowners looking for trusted garage door services in Friendswood or those searching for a reliable garage door company in Webster can count on Level Up Garage Door for honest advice, proper repair, and lasting results.
Conclusion
Changing the battery in your garage door opener is one of the easiest ways to restore door safety and performance at home. With the right battery, a screwdriver, and this guide, most homeowners can handle the replacement in under 15 minutes. If the problem goes deeper than the battery, do not guess. Get expert assistance from a team that knows garage door openers well. Schedule a garage door service appointment with Level Up Garage Door today and keep your door running at its best year-round.